Craving that creamy, sweet indulgence in your desserts but sticking to a dairy-free lifestyle? The search for the perfect substitute often feels like a quest, particularly when a recipe calls for the rich, thick magic of sweetened condensed milk. Traditional condensed milk, a staple in countless beloved treats, presents a hurdle for those avoiding dairy. But what if we told you there’s a simple, delicious, and incredibly versatile solution that opens up a world of dairy-free dessert possibilities? Enter sweetened condensed coconut milk – a game-changing ingredient that’s easier to make at home than you think, and utterly transforms your baking and sweet creations.
Far from a mere compromise, homemade sweetened condensed coconut milk offers a luscious, coconut-kissed twist that elevates your dairy-free pies, bars, candies, and even beverages. It's not just about avoiding dairy; it's about embracing a new depth of flavor and texture that truly stands on its own.
The Dairy-Free Revolution: Why Sweetened Condensed Coconut Milk is a Game-Changer
For years, finding reliable dairy-free alternatives for classic recipes has been a challenge. Sweetened condensed milk, a product of milk and sugar cooked down to a thick, syrupy consistency, is a particularly tricky ingredient to replace. It provides not only sweetness but also a unique texture, binding power, and creamy mouthfeel that’s hard to replicate with single ingredients.
While some store-bought dairy-free condensed milk options have emerged, they often come with a higher price tag, a limited ingredient list (sometimes containing unwanted fillers), or simply aren't readily available. This is where the beauty of making your own sweetened condensed coconut milk shines. By harnessing the natural richness of full-fat coconut milk and combining it with your sweetener of choice, you create a product that is not only dairy-free but also adaptable to various dietary needs, including sugar-free or keto lifestyles.
Beyond Just Dairy-Free: The Benefits of Homemade
- Unparalleled Ingredient Control: You dictate what goes into your condensed milk. Say goodbye to preservatives, artificial flavors, and unwanted additives often found in commercial products.
- Customizable Sweetness: Whether you prefer organic cane sugar, coconut sugar for a caramel note, honey, or a keto-friendly erythritol, the choice is yours. This flexibility is a huge advantage for health-conscious bakers.
- Cost-Effective: Making it at home is often significantly cheaper than purchasing specialty dairy-free condensed milk, especially if you buy coconut milk in bulk.
- Freshness and Flavor: Enjoy the vibrant, fresh taste of homemade ingredients. The subtle hint of coconut adds a delightful complexity that store-bought versions often lack.
- Dietary Inclusivity: Perfect for those with lactose intolerance, milk allergies, vegan diets, or anyone simply looking to reduce their dairy intake without sacrificing indulgence.
Mastering the Art: Crafting Your Own Sweetened Condensed Coconut Milk at Home
The idea of making sweetened condensed coconut milk from scratch might sound intimidating, conjuring images of complex culinary chemistry. However, nothing could be further from the truth. This process is surprisingly straightforward, requiring minimal ingredients and a little patience. It’s essentially a reduction process that transforms two humble ingredients into a luxurious, thick syrup.
The Essential Ingredients
To embark on your homemade condensed milk journey, you'll need just two core components, though their quality and type can significantly influence your final product:
- Full-Fat Coconut Milk: This is non-negotiable. Look for canned, full-fat coconut milk (not "light" or "reduced-fat") with a high coconut extract percentage. The fat content is crucial for achieving the desired rich, thick consistency. Brands with minimal stabilizers and emulsifiers are often preferred for a cleaner taste.
- Sweetener of Choice: This is where you can truly personalize your condensed milk.
- Organic Cane Sugar: A classic choice for a neutral sweetness and light color.
- Coconut Sugar: Imparts a beautiful caramel-like flavor and a darker hue, reminiscent of dulce de leche.
- Honey: Adds its unique floral notes and a lovely golden color.
- Erythritol (or other keto sweeteners): Ideal for sugar-free or ketogenic versions, allowing you to enjoy decadent treats without the added sugars. Remember that different sweeteners can have varying levels of sweetness and might require slight adjustments.
While not strictly necessary, a tiny pinch of salt can balance the sweetness and deepen the flavor, and a splash of vanilla extract can add a delightful aromatic complexity, making your condensed milk even more gourmet.
Step-by-Step Simmering to Perfection
The process of creating your own sweetened condensed coconut milk is a simple, two-step affair:
- Gather and Combine: Begin by pouring 2 cans of full-fat coconut milk into a medium saucepan. Add your chosen sugar or keto sweetener. Use a whisk to combine thoroughly until the sugar begins to dissolve.
- Simmer and Reduce: Place the saucepan over medium-high heat. Bring the mixture to a gentle simmer, stirring frequently. This is the crucial stage where vigilance pays off. Continuous stirring prevents the coconut milk from scorching at the bottom and ensures even reduction. As it simmers, the liquid will gradually reduce and thicken.
A Handy Trick for Reduction: To accurately gauge the reduction, place a separate, heatproof utensil (like a spoon or spatula handle) into the mixture at the beginning and note the initial liquid level. As you simmer, you'll want the liquid to reduce by approximately half. This visual cue helps ensure you achieve the perfect thickness without over-reducing. The process typically takes about 15-20 minutes, depending on your stovetop and pan size. Remember that the mixture will thicken considerably more as it cools.
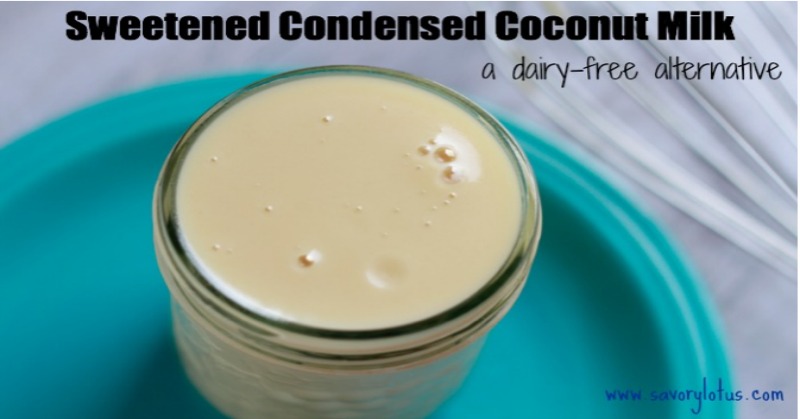
Once reduced and thickened to your desired consistency (it should coat the back of a spoon and fall off slowly), remove it from the heat. Pour the sweetened condensed coconut milk into a clean glass jar or container and allow it to cool completely at room temperature before storing it in the refrigerator. This recipe typically yields about 12-14 ounces of delicious coconut condensed milk, ready to transform your dairy-free desserts.
For more detailed step-by-step guidance and to explore various sugar and keto options, refer to our articles on Master Easy Dairy-Free Sweetened Condensed Coconut Milk and Homemade Sweetened Condensed Coconut Milk: Sugar & Keto Options.
From Pies to Puddings: Unleashing Culinary Magic with Coconut Condensed Milk
The beauty of homemade sweetened condensed coconut milk lies in its versatility. It can be used as a direct, one-to-one replacement for traditional sweetened condensed milk in virtually any recipe, seamlessly integrating into your favorite sweet treats and opening up new avenues for dairy-free indulgence. The subtle coconut notes add a tropical twist that complements a wide array of flavors.
Classic Desserts Reimagined
- Pies and Tarts: Whisk it into pumpkin pie custards, create a vibrant key lime pie filling, or use it as a creamy base for no-bake chocolate or fruit tarts.
- No-Bake Bars and Candies: Elevate your no-bake cookies, fudge, truffles, and millionaire's shortbread with its rich texture and sweetness. It's the secret to creating perfectly set, chewy, and decadent confections.
- Ice Cream and Frozen Treats: Fold it into a no-churn ice cream base for an incredibly creamy, scoopable frozen dessert. Imagine coconut condensed milk coffee ice cream, inspired by Nigella Lawson's famous recipe, or a luscious mango sorbet.
- Puddings and Custards: Enhance the richness of rice puddings, custards, and even dairy-free flan, giving them a velvety smooth texture and depth of flavor.
Beyond the Bake: Sweetening Sips and Spreads
- Coffee and Tea Enhancer: Stir a spoonful into your iced coffee, Thai coffee, or chai tea for a wonderfully creamy, sweetened beverage that rivals your favorite café creations.
- Whipped Toppings and Frostings: Whip it into a dairy-free frosting or soft cream for cakes, cupcakes, or fruit parfaits, adding stability and a delightful coconut flavor.
- Creamy Sauces: Use it as a base for sweet glazes or drizzles for pancakes, waffles, or fruit salads, adding a touch of elegance and sweetness.
Expert Tips for a Flawless Batch Every Time
While making sweetened condensed coconut milk is straightforward, a few expert tips can ensure your batch is perfect every single time, yielding a consistent, delicious result that will impress even the most discerning palates.
Full-Fat is Non-Negotiable: We can't stress this enough. "Light" or "reduced-fat" coconut milk simply won't reduce and thicken correctly, leading to a watery, disappointing result. Always opt for premium quality, full-fat canned coconut milk for the best outcome.
Stirring is Your Friend: The sugars in the mixture can easily scorch at the bottom of the pan if left unattended. Frequent, gentle stirring, especially as it thickens, is crucial to prevent burning and ensure a smooth, uniform consistency.
The Reduction Mark is Key: Don't guess. Using a heatproof utensil to mark the initial liquid level, as mentioned earlier, is the most reliable way to know when your sweetened condensed coconut milk has reduced by half and reached the ideal consistency.
Patience Pays Off: Rushing the reduction process by cranking up the heat too high can lead to burning or an inconsistent texture. A medium-high heat allows for a steady, controlled reduction that yields the best results.
Flavor Enhancements: A small pinch of salt (about 1/8 to 1/4 teaspoon per batch) can dramatically enhance the sweetness and depth of flavor. A 1/2 teaspoon of vanilla extract, added after removing from heat, provides a lovely aroma and rounds out the taste profile. Adjust these to your preference.
Scaling Up: If you plan to double or triple the recipe, consider using a larger, wider pot. A greater surface area allows the liquid to evaporate more efficiently, preventing it from taking an excessively long time to reduce.
Storage and Shelf Life: Once cooled, transfer your homemade sweetened condensed coconut milk to an airtight glass container. It can be stored in the refrigerator for up to 1-2 weeks. Always check for any signs of spoilage before use.
Consistency Check: Remember it will thicken considerably as it cools. When hot, it might seem a bit thin, but once chilled, it should be thick enough to slowly coat and drip off a spoon, similar to traditional condensed milk.
Conclusion
Unlocking the world of delicious dairy-free desserts doesn't have to be a daunting task, especially with the magic of homemade sweetened condensed coconut milk. This simple, two-ingredient wonder empowers you to take control of your ingredients, customize your sweetness, and recreate all your favorite treats without compromise. From velvety pies and fudgy bars to creamy coffees and decadent ice creams, the possibilities are endless. So, gather your ingredients, embrace the joy of simmering, and prepare to elevate your dairy-free baking to an entirely new level of deliciousness. Your taste buds (and your dietary needs) will thank you!
